Xiao Wang next door took his notebook to my repair shop today, said that his laptop Lenovo Y470 always shakes, do not know what the reason, let me help look.
I took a closer look and found that the problem was very simple. It should be the broken studs on the side of the D case of the notebook. It is recommended that he change the D case on the line. The following share my disassembly and replacement process for reference.
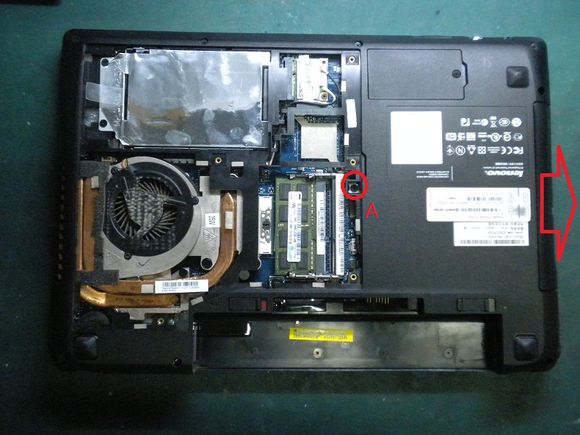
1. Remove the battery by snapping the battery clips on both sides and removing the battery in the horizontal downward direction. Then unscrew the screws on the cover of the CPU heat sink. This screw is fixed on the cover. Do not remove it and unscrew it, as shown below.

2, remove the rear cover, as shown below unscrew the optical drive fixing screw, in fact, is the keyboard fixing screw, remove the light horizontally to the right drive.

3, because to remove the host cover C shell, so here I have to remove all screws on the D shell, there are three: B, EF. As shown below.

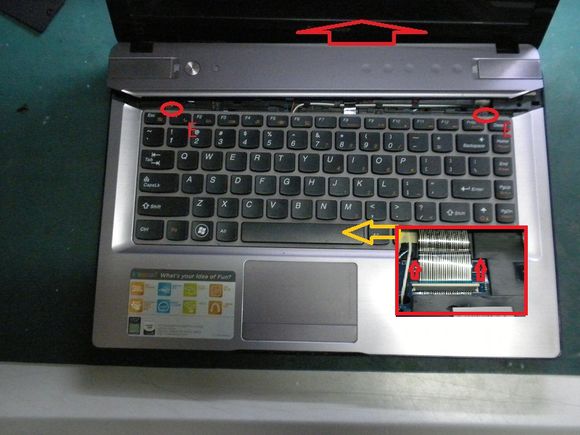
4, turn over the computer, you can remove the keyboard cover and the keyboard, the first keyboard cover, first from the root of the red arrow below pull out the keyboard cover, and then remove the keyboard cover on both sides, pay attention to both sides of the card Buckle oh, slowly move the two sides can be removed, unscrew the two keyboard E screws, flip up the keyboard, at the bottom of the keyboard at the yellow arrow keyboard connection, carefully removed.

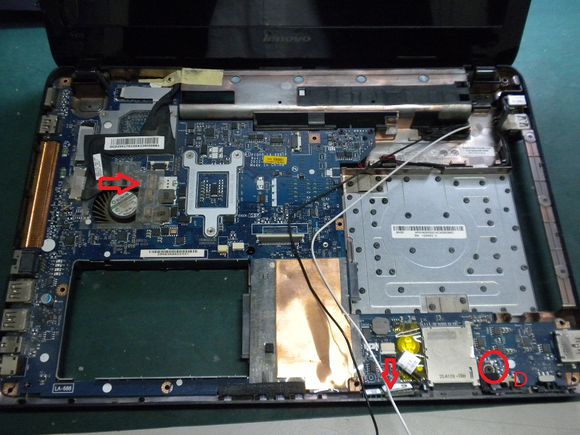
5, remove the keyboard cover connection, touchpad connection, speaker connection, wireless network card antenna removed from the card. Then we must remove the C case. Take the C case to separate the C D case from the position of the optical drive.

6, remove the C case, as shown below, remove the screen line to the right, and unscrew the motherboard D fixed screws. Take the motherboard when the right first to take.

7, after the motherboard is removed, you can see the D shell, change the D shell is only the last step, remove the screen. The following figure shows the C D screw of the fixed screen. The culprit of the left axis of the screen can be seen in the green frame below. The stud on the D shell is broken.

8, remove the power cord, USB small board, you can replace the D shell.

After the D-shell is replaced, it can be assembled back in the opposite direction. Of course, you can also remove the ash before installing it.


