Most users on the Internet report that the 1515R 17 17R 3521 3721 5521 5535 5721 in the Dell Inspiron series has been used for several years. The running speed of the notebook dropped, and the notebook got hot. Xiao Bian used Dell Inspiron 15R this notebook to teach everyone to disassemble and clean the dust. The 17 17R 3521 3721 5521 5535 5721 notebook internal structure, the method is the same. Detailed explanations for demolition and clean-up tutorial:
1、remove the laptop battery
The first step in dismantling the basic notebook must take into account power off, unplug the battery. Note that the disassembly process is prohibited from working with electricity. It is dangerous.

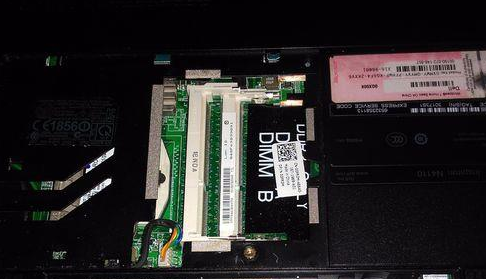
2、remove the back cover and remove the memory
Unscrew the screws with a screwdriver, remove the cover, you will be able to see the memory. Swipe both sides to remove the memory.
3、remove the drive
A fixed drive screw, unscrew the fixing screws, tic drive sideways. After removing the CD-ROM, CD-ROM see below need to unscrew the screws. Prepare for the next steps, also unscrew the fixing screws below the battery.

4、Remove the keyboard
Unscrew the rear screws and check the buckle between the keyboard and the panel. Gently pry a snap with a screwdriver, the locking lever around, the keyboard can be removed. Note that the keyboard cable, do not pull hard. Remove the lower panel of the keyboard, unscrew the screws under the keyboard, disassemble the connection cable, and remove the panel.

5、 remove the motherboard
Unscrew the link screw and unplug the link cable. You can remove the motherboard. Pay attention to the monitor. It is necessary to remove the monitor and the lower bezel first. Screws are classified for easy installation.

6、Clean the fan fan dust
Sweeping dust and a fan vent dust ,, notebook fan can be disassembled. This is more convenient and thorough clean-up, have to re-apply grease, first wipe off the old grease with a paper towel.


After completing the above steps, you can reassemble the removed parts. Turn back in the reverse direction to install the removal procedure, attention installed during gently. In particular, the position of the cable, excessive force may result in damage to the notebook connection line.


