.png)
Global Professional laptop Parts Seller
There is a saying how to say, people are prone to calcium deficiency as they get older. The toilet lasts a little bit too long and the notebook is the same. After using it for a few years, various problems have arisen, such as a boot. The fan quarreled like a tractor and it was very annoying.
How to do it? Xiao Bian suggests you change your notebook fan.
Online shopping is now very convenient, most of the things can be bought online, Lenovo v580 notebook fan is also very easy to buy.
After buying the right notebook fan, the next step is to disassemble the new fan. Xiaobian arranges a graphic tutorial for the Lenovo v580 notebook fan for your reference.
Disassemble before preparation: a screwdriver, grease, brush (by the way to clear the internal dust).
1, remove the laptop battery, then remove the back cover and unscrew the set screw, pull down the back cover.
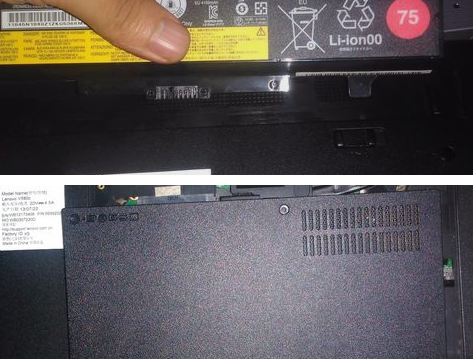
2, remove the memory and drive. When the back cover is removed, you can see the memory, shake the buckles on both sides, and remove the memory. Unscrew the fixed screw of the optical drive and pull the optical drive to the left. Note that there are three small screws under the drive.

3, remove the wireless network card. There are two small cards here, all of which are fixed by screws. Unplug the fixing wire first, then tighten the screw and take out the card.
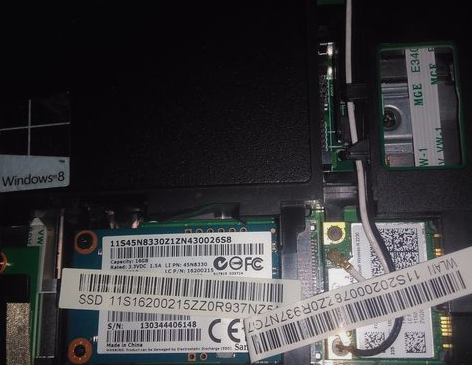
4, remove the hard drive. The hard disk is screwed, unscrew the screw, and pull out the hard disk. Then unscrew all the screws behind to prepare for the next step.

5, take the keyboard. Gently press the upper right corner of the keyboard with a thin screw. Afterwards, remove the keyboard. When taking the keyboard, take care to handle it gently. There is a connection line under the keyboard. Unscrew the screws under the keyboard and remove the cover.

6, remove the fan. After removing the motherboard, you can in turn see the heat sink. Unscrew the set screw and remove the cooling fan.

7. Use a brush to clean the dusty parts inside. Gently scrape off the dried CPU and GPU grease and apply new grease.
Finally, install a new notebook fan and install the machine in the reverse order above and start the test.


