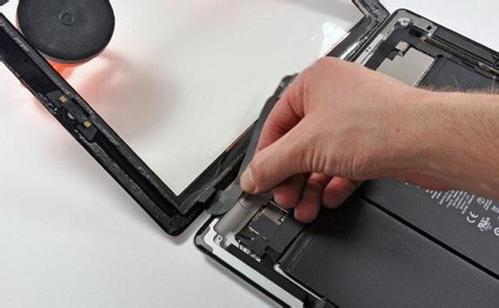
Like all electronic products, notebooks have a variety of problems after they have been used for a long time. Today we will tell you about the problem of notebook display screens and teach everyone how to repair the display screen cables.
Tool preparation before dismantling: electric iron (high-quality tin wire, rosin, etc.), digital multimeter, art blade, 703 or 704 silicone rubber (sealed line output high pressure nozzle thing).
The first step: The color and appearance of the notebook cables of major brands may not be the same, but the structure is certainly the same. The connection lines between the LCD screen and the motherboard are mostly below the LCD screen. The notebook computer must be disassembled first to see the cable. In general, first find a soft cloth on the table, so that the bottom of the notebook is up, remove the bottom of a few screws, and then turn the notebook face up, open the LCD screen, then we can put " The notebook's front panel and keyboard are removed. Note that there are mouse and speakers on the front panel. Most of them are connected to the motherboard with a cable with a plug. The keyboard is no exception.

The first thing to do is to carefully remove the plug from the motherboard and remove the front panel and keyboard. At this time, we can see the motherboard of the “notebook”. There are usually two cables from the motherboard to the LCD screen. The widest one (about 4 centimeters in width) is the cable for transmitting data signals. It is There is a broken center, and the other is for LCD backlights. Some laptop motherboards have a cable to the LCD screen, but they only use the LCD screen signal and the signal to control the backlight with a cable. Simply pull the two cables upwards, pull them loose, and pull them up while holding the connector at the bottom to pull out the cables.

The second step: After finding the platoon line, we must first use observations. We must first look at the center of the platoon with a visible crease. The severance of the platoon is caused by a crease. Can use the high magnification magnifying glass to assist in the observation under the strong light, because the cable is thinner, the broken center should be able to see.

The third step: After finding a suspicious point, in order to ensure that nothing is lost, use the digital multimeter to further "confirm". The ordinary table pen certainly can not, in the table pen, respectively, with a sewing needle, with a 200 ohm resistor file, the table pen on both sides of the suspicion break point with a sewing needle instead of the table pen quietly open the layer of the line with toughness Measured in thin film, the resistance appears immeasurable and it must be broken here. After the breakpoint is found, we can use the blade to scrape the film with toughness. This step must be taken care of because the cable is too thin. Too thin, do not scrape so thin the line, but can not scrape the hole in the row, in order to reveal the metallic luster prevail.

Step 4: After welding, prepare for welding. Use a blade to scrape some of the rosin powder on the scraped wire (for soldering), then wait for the iron to heat up. Unplug the power plug from the soldering iron ( This step must be done, otherwise the motherboard is burned by static electricity), the residual heat is applied, the soldering iron tip is slightly stained with solder, and the center of the rosin powder is quickly wiped on the cable, and then lifted vertically and the cable is disconnected. The center was welded well, remember, the speed must be fast, otherwise the cable will be scalded, if you can not do it several times, it is best to find a disc player or mobile phone cable first Welding technology is good to start again.

Step 5: After soldering, the digital multimeter is tested correctly. The 703 silicone rubber is coated on the solder joints, on the four sides, and on the opposite side. After about one or two hours, it waits for the appearance to air dry and then repeats the coating 1-2 times. , Application of 703 silicone rubber dry after the elastic properties play a role in fixed solder joints, so that it will not be disconnected again in the future.
Finally, re-install the notebook boot test to see if it is normal, then tighten all the screws, the entire repair work is done.


