Want to give your Thinkpad T51 laptop a new keyboard but don't know how to remove it? Don't worry, you will see it after reading this article.
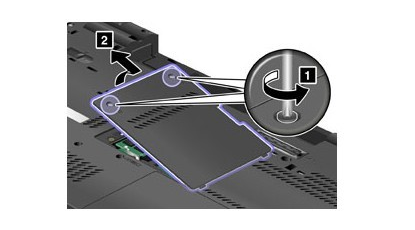
First pull out your T510's power supply and remove the battery. If you can do this, it's better to remove the static electricity before you remove it. Then you can see that the two screws on the back cover are fixed as shown in the figure below. Unscrew the screw in the direction of the arrow and remove the rear cover as shown in the figure below. The memory of this series is also installed in this position. If you need to replace the memory or upgrade it, you can also operate it here.

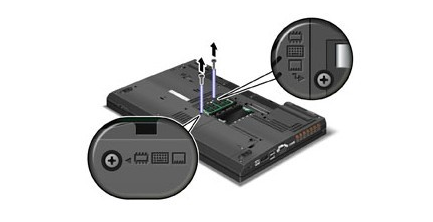
After opening the back cover a total of two keyboard screws to fix, as shown in the following figure if the keyboard LOGO, is used to fix the keyboard of the two screws.

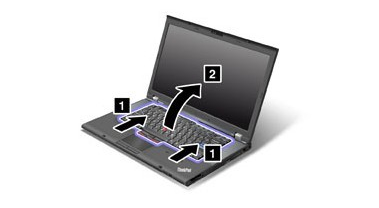
Turn the screw and then we turn the T510 back, the computer screen opens in accordance with the following process, first push the keyboard and then flip the keyboard to remove it.

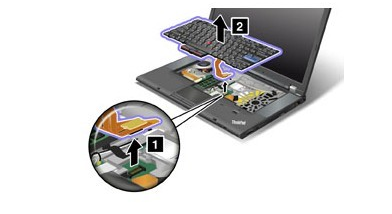
The data cable below the keyboard is in a special place, as shown in the following figure. There is a handle on the data line that can be lifted. It is used to open and remove the keyboard.

If the installation is reversed, it is the opposite. First insert the keyboard and then push it back to complete the operation. Note that the built-in wireless network card and 3G module are installed under the keyboard.


