DELL Inspiron N4050, M4040, N5050, M5050, M5040, N5040 these models belong to the DELL Inspiron series models, these notebook models are using the same type of keyboard, internal structure is similar, mainly various models The configuration is different, so their disassemble method is the same. Xiao Bian used your DELL Inspiron N4050 to teach you to disassemble.
Tools to be prepared before the machine is disassembled: 2 screws (Phillips screwdriver and 1 screwdriver), card, brush, soft cloth, cotton swab, and grease.
1, first shut down, then first take down the laptop battery, remove the battery, turn the notebook back to the front, ready to remove the DELL Inspiron N4050 notebook C side keyboard.
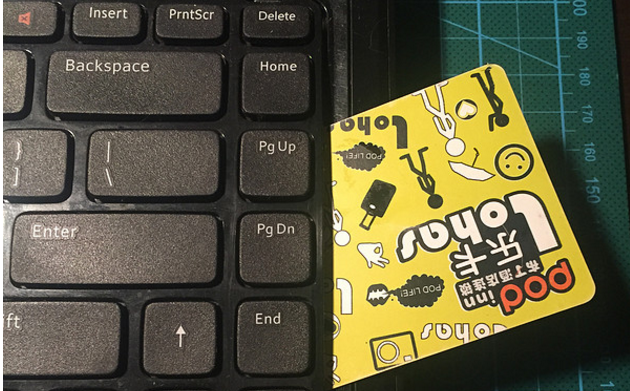
2, first insert a card on the side of the notebook, top the keyboard part, as shown below.

3. Use a flat-blade screwdriver to insert the buckle on the top of the keyboard, and slowly press down while pressing the inside. Attention should be paid. If you do not master it, it is easy to scratch the face of C. There are 3 buckles.
4, the keyboard can now be picked up, but the keyboard is still connected under the cable, the cable can be removed to remove the keyboard.
5, continue to remove the DELL Inspiron N4050 notebook drive, the first to pull out the bottom of the touchpad cable and the power cable above, and then use a screwdriver to remove the fixed drive screws, the top two other screws are also removed, then outward A push, the optical drive came out.
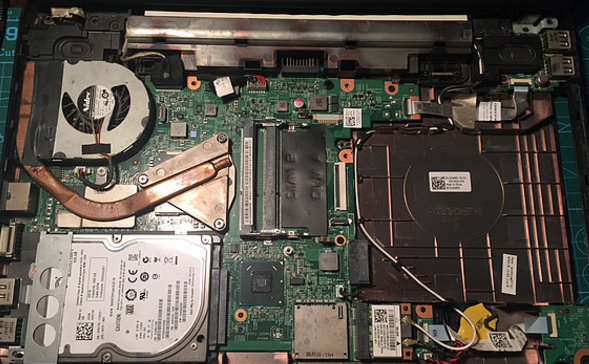
6, remove the memory. Gently open the clips on both sides, the memory will play up a little arc, this time press down and pull out, the other memory is the same way to pull out.
7, then turn to the back of the notebook, the D side of the outside of the 8 screws with a Phillips screwdriver to remove all the top of the battery compartment there are two short Phillips screws to take it down, screw remember the classification of good storage.

8. After all the screws on the D side have been removed, move the notebook back to the C side and slowly insert the side slits on the C side of the card. The C side can be removed from the buckle.
9, then remove the fan, first disconnect the cable, remove the fixed screws on the CPU and GPU, remove the cooling module.
10. Clean the DELL Inspiron N4050 notebook fan. First remove the two fixing screws of the fan, slowly open the buckle to open the fan, then use a cotton swab with a soft cloth and brush to clean it repeatedly.
11. After the fan is cleaned, clean all other dusty parts. Use a soft cloth to wipe off the silicone grease from the CPU and GPU. Reapply the new silicone grease. Do not apply too thick. Apply evenly.
12. At the end, the DELL Inspiron N4050 notebook was assembled back again, and the above steps could be carried out step by step.


