The Toshiba satellite C850 C855 C875 C870 L850 L870 belongs to the Toshiba satellite series. This series of notebooks disassemble dust cleaning methods are the same, the specific teardown cleaning tutorial is as follows.
Step 1: Remove the laptop battery and remove the Toshiba notebook back cover screw.
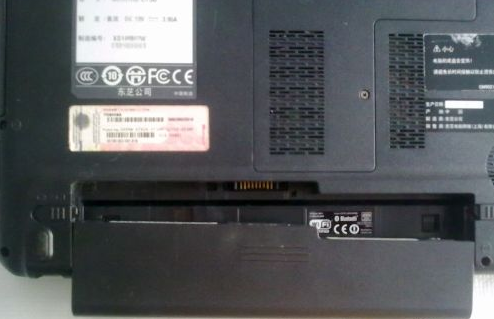
Step 2: Open the small cover of the back cover, first remove the two screws in the red circle below, remove the notebook hard drive, and then take out the optical drive. After the hard drive is removed, remove the two internal screws and then remove the drive. The screws below the optical drive are also removed.
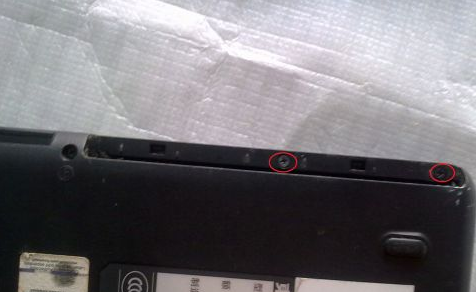
Step 3: Open the small cover of the back cover, first remove the two screws in the red circle below, remove the notebook hard drive, and then take out the optical drive. After the hard drive is removed, remove the two internal screws, and then remove the optical drive and put the drive. The following screws are also removed.
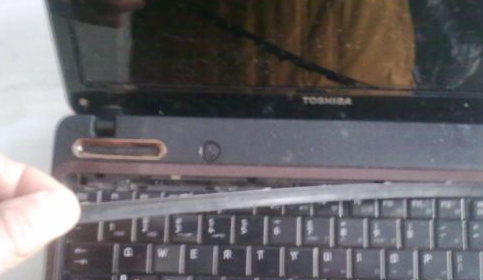
Step 4: The Toshiba Satellite series notebook keyboard is fixed by snaps. The keyboard can be flipped over with the top of the screw. The keyboard and the touchpad cable can be removed by pulling up one lever.
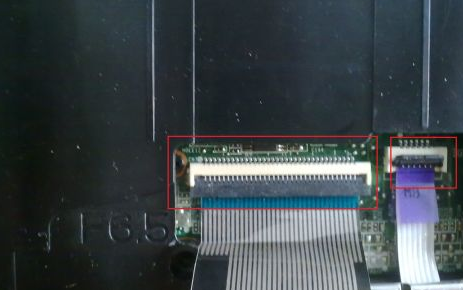
Step 5: There are 3 screws below the Toshiba notebook keyboard. Loosen it. Note that there are several buckles. Afterwards, the entire panel can be removed, and scrap cards are slowly picked up along the edges.
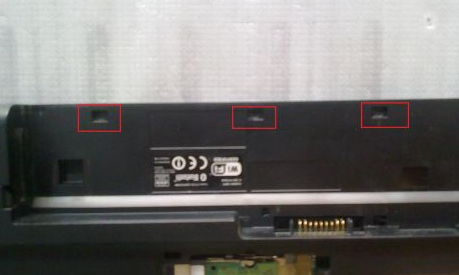
Step 6: Do not use too much force when picking up the panel. There is also a connection cable inside. Remove it first. Then remove the lavender cable and then remove the white power connector cable. Remove the purple cable, video card cable, and wireless card cable in turn. The screw on the graphics card connector should be removed.
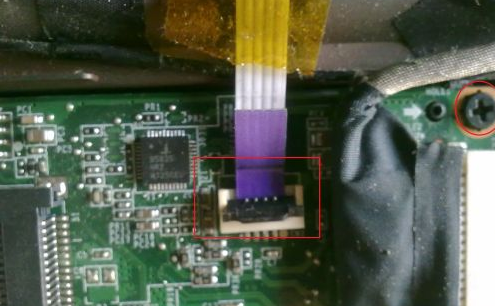
Step 7: Remove the screw that secures the fan of the notebook and you can remove the motherboard. Pull it out gently. Turn the motherboard upside down, remove the screws that secure the cooling system, and note that the fan cable is also buckled.
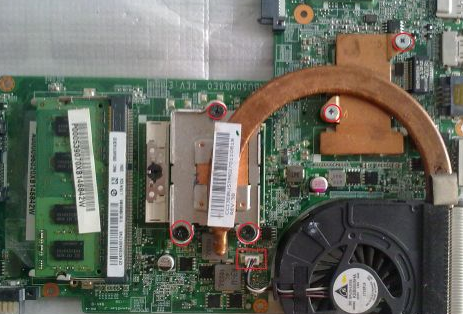
Step 8: Clean the fan. First pick up the three clips on the base, and then remove the small screws, you can open the fan, take the fan leaves to clean it, add a drop of lubricant to the bearing base, the outlet grille plug here a lot of hair Dirty things like that, all sweeping, do not forget to wipe off the old grease, and then apply new, do not apply too thick, this will affect the heat, wipe the uniform on the line.
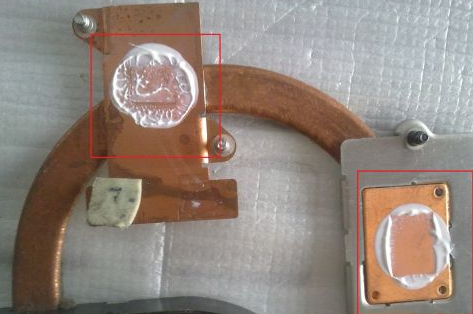
After the cleaning is completed, follow the reverse steps to put the Toshiba notebook on it. Note that when replacing the fan, do not forget to insert the cable. Before replacing the drive, you must screw two screws under the drive. These two steps are easy to neglect. Of course, you can also take a photo step by step, so as not to forget the position of the screw.


